
Khandvi recipe is a guilt free Indian snack famous in Gujarat, Maharashtra prepared with gram flour and curd. With full video and step by step pictures.
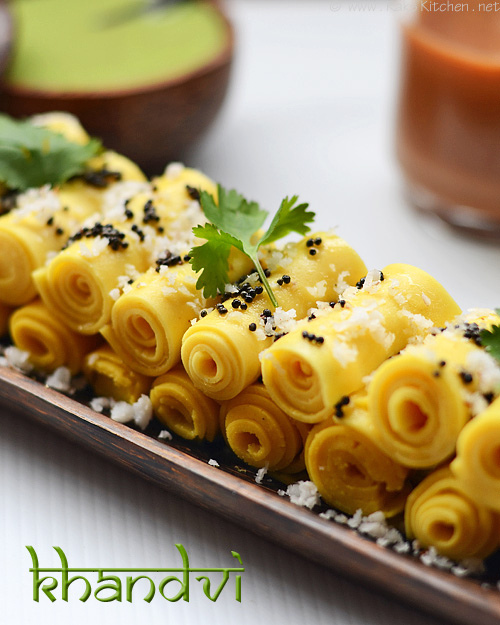
This is the first time I am tasting a khandvi that too tried first time by me. This ingredients are so similar to that of Khaman, only the method is different.
Quite tricky but sure not difficult to try. But I always had a fear to try this though I wanted to try it earlier. I had a recipe written in my cookbook handwritten and passed to me by my mom.
But I was so afraid as I was thinking it would be difficult. Then how did I overcame this?
My friend Sangeeta sent me step by step pictures of the khandvi her aunt made and inspired me and gave the confidence to try. Thank you for taking time to send those pictures Sangeeta.
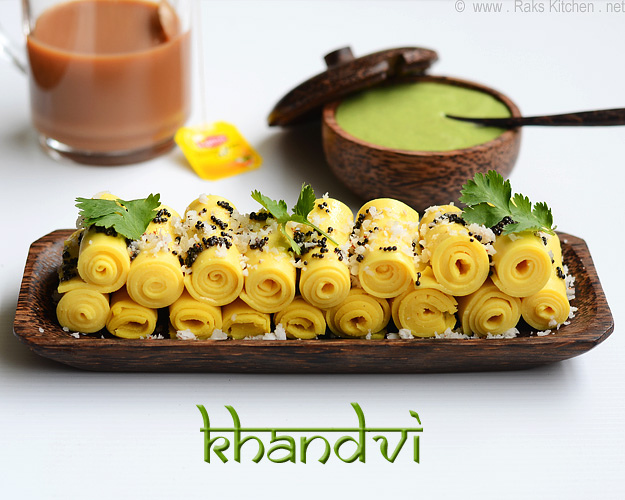
Now I can make this often and make it when ever somebody visits for snack time. Yes, its perfect for party as starter. Just make a green chutney and make this and everyone can pick and have chit chat along with this delicious yet guilt free authentic snack!
Stepwise photos
1. Take besan, curd, water, salt and asafoetida (turmeric also if adding) in a heavy bottomed pan. Using a whisk, beat it smoothly. Heat this in medium flame with constant stirring.
2. Make sure you stir well until bottom as the bottom of the batter gets thickened faster. Stir until the mixture thickens and gets cooked. It must not be too thick, just like a paste that will be easy to spread. Do not let it over cooked, otherwise you may not be able to spread.

3. Keep ready - clean counter top or a cutting board smooth and plain as I have used as shown in the picture. You also need a spatula to spread the mixture. If you are not comfortable using counter top as such, u can use aluminium foil over the counter top.

4. Act quickly, transfer the batter to the counter top. If you have more batter, do it in two or three places. I used very less, so needed only one plastic cutting board. So I spread the batter thinly using the spatula. Let it cool down completely.

5. Draw lines with a knife into strips. Trim the edges. I divided the strips into two and gently rolled into khandvis.

6. Lastly arrange it in a tray and temper with the mustard, asafoetida and spread it over the khandvis. Garnish with coriander and grated fresh coconut.

Serve it with lots of fresh grated coconut garnished along with Green chutney as side dish/ Dip. Perfect tea time snack for your family too.
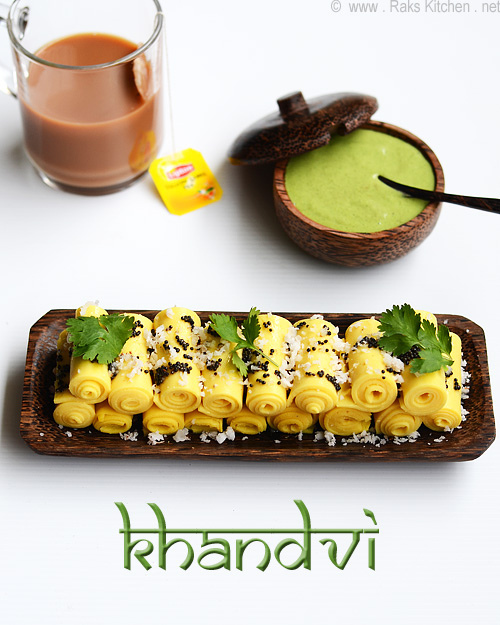
Recipe card

Khandvi recipe
Ingredients
- ½ cup Gram flour Besan
- ½ cup Curd
- ¾ cup Water
- ⅛ teaspoon Asafoetida
- Salt
- 1 Pinch Turmeric optional
- 3 tablespoon Coconut grated
- 3 tablespoon Coriander leaves chopped
To temper
- 2 teaspoon oil
- ½ teaspoon Mustard
- 2 pinches Asafoetida
Instructions
- Take besan, curd, water, salt and asafoetida (turmeric also if adding) in a heavy bottomed pan.
- Using a whisk, beat it smoothly. Heat this in medium flame with constant stirring.
- Make sure you stir well until bottom as the bottom of the batter gets thickened faster.
- Stir until the mixture thickens and gets cooked. It must not be too thick, just like a paste that will be easy to spread.
- Do not let it over cooked, otherwise you may not be able to spread.
- Keep ready - clean counter top or a cutting board smooth and plain as I have used as shown in the picture.
- You also need a spatula to spread the mixture. If you are not comfortable using counter top as such, u can use aluminium foil over the counter top.
- Act quickly, transfer the batter to the counter top.
- If you have more batter, do it in two or three places. I used very less, so needed only one plastic cutting board. So I spread the batter thinly using the spatula.
- Let it cool down completely.
- Draw lines with a knife into strips. Trim the edges.
- I divided the strips into two and gently rolled into khandvis.
- Lastly arrange it in a tray and temper with the mustard, asafoetida and spread it over the khandvis.
- Garnish with coriander and grated fresh coconut.
Video
Notes
- If the mixture gets over cooked and too thick, then you will not be able to spread properly.
- If the mixture gets cooled down, the spread will become thick and so do the khadvis too. So act quickly.
- Instead of spreading as rectangles, you can do like a dosa/ crepes and cut that too. Use a ladle to spoon the batter also a spatula to level the thick parts.
- If your batter is not cooked properly, then you cannot roll the strips and it will be sticky.
- Do not apply pressure while rolling, do it gently. otherwise it will break and wont look nice.


Padmini Sridharan says
super I shared Thank U
lata raja says
very beautiful and self explanatory step wise pictures. I have tried also in the microwave, taking the easier way. Now this post makes me want to cook them again for snacks.
Vaishnavi says
Very tasty snack. Always wanted to try this but never had the courage. Now this gives me gud encouragement to try
Hari Chandana P says
This is one of my favorite Indian snacks.. These turned out really well.. Yummy 😀
Rads says
Superb Job Raks...i too hav a similar recipes(tht i got from a gujju channel) but similar situation,never had a courage to try it..aft seeing ur pics..am definately gonna try...thnx...n well done!!!!
Nivedhanams Sowmya says
great job raji!!! khandvi looks awesome!!
Jeevi Sharanya says
sooooo appetizing...........gng to try it soon 🙂
meeta says
Hi....thanks for making and enjoying this authentic gujarati snack.....I love it....making always in large qty....so I used a big plastic sheet of 2 mm thickness to spread it..
AparnaRajeshkumar says
this is so easy raji ... initially we sacred to try .. but it is as easy as to make also it tastes best with green chutney,, u done so nicely
prathibha Garre says
Love this snack, u made them perfect
meeta says
U can try super duper easy version of this too....chk tarla dalal website for microwave khandvi....with this qty ....it will take only 4.5 min in microwave without stirring so much.......:-)
Hema says
Wow, such perfect rolls, can't take my eyes off the pictures..
subha rajesh says
Awesome clicks..
Dipti Joshi says
Wow! tempting snaps! Perfectly made.
Sangeetha M says
have tried this 2 times but was all failure, yours looks so perfect and cute like a bunch of yellow roses 🙂 semma clicks and pretty props...nice!
Kurinji says
Wow ! superbbbbbbb clicks and yummy snack.
VineelaSiva says
Nice recipe never tired and tasted.Will try it.
Gayathri Ramanan says
lovely and beautiful presentation....stunning clicks....
Chella KS Nathan says
watta wow cooking raks 🙂 awesome !! it is like a art work 🙂
Anitha Harish says
Hi raks...
This is the first time i am commenting.... I tried a lot of dishes from your website... It comes out so well and my husband enjoys too :P..
I tried Khandvi .... it came out as you had posted.... but while rolling it it some pieces started breaking off.. What could be the reason...???
Thanks a lot for a wonderful website.. keep rocking 😀
divya says
Wow ! mouth watering here.
Raks anand says
If it's little bit thick then it breaks while rolling.
Aathira Nair says
I had completely forgotten about Khandvi... should make some tomorrow morning. thanks for reminding me!
Shama Nagarajan says
delicious raji....awesome photo
Veena Theagarajan says
so tasty and tempting snack.. I also so scared to try this one.. now u have given me a boost
sandhya sekar says
vare va akka:) super starter
meenubhalla says
u didnt showed the pik while filling
Preetha Ramesh says
Pl give the recipe of the green chutney also .
Shukavaneshvarah says
I tried the reciepe today, and could not get the batter to the correct consistency. What is the indicator to know that you have cooked it enough - it was sticky, right through... Can you please give an indicator as to the consistency? Thanks.
Preetha Soumyan says
lovely pics..and which is the photo editor that you use
Shobana says
Beautifully pictured! Like some one else asked, how do u edit ur pictures?
Anonymous says
I love khandvi Raks. I used to make it very often around 5 years ago as my daughter liked them a lot! I learn it from a bihari friend. I used to add kala namak in the batter and this would make it so tangy and tasty!
I love it with sweet chutney and green chutney. Lovely pics Raks.
Shobha
Nagalakshmi V says
dropping by after so long. the first pic is gorgeous raks 🙂
Raks anand says
The colour will be different, between raw and cooked. Hope u will understand when I upload a video.
Srigeetha P says
Hi,
This is first dish i tried from ur blog. I did exactly as u said. but till cooked batter was fine but after i spread it din't dry at all.. n i cudn't cut them too. I don't know mistake.. 🙁
Very nice collection of recipies.. 🙂
rena anand says
can i put any other cooked filling on the layer before we roll it?
Suba Shiva says
i think we can add some slit green chili while poppu.. tht way there will be some spiciness.. btw i luv khandvis a lot
Corporate to Kitchen says
That looks really easy to make & your pics are drool worth.
Raks anand says
I have updated the video. Refer the video and try again, sure it will come out nice.
Kavita Suresh says
Adding ginger and chilly paste to the batter takes it to a different level. Else, we can also add slit green chillies to the tempering. Yummy khandvies
Durga says
It's one of the pressure task given to Master chef Kitchen Superstar Contest in Star plus... You have done it just like that..
medhavi says
U my it seem be easy. Wl try
Chella KS Nathan says
if anyone would have told me this i would never have even imagined making this, ure awesome and it came out damn good. more than the taste, the shaping was the one i was worried a lot about and u did not fail me :)) thanks :))
SHARMILEE J says
You have nailed it!!
Super kalakita poo
halwits says
This dish is like a gem in the king's crown. I am thankful for sharing the recipe of such lovely vegetarian dish.
chadi chadouni says
great job raji!!! khandvi looks awesome!! i
Anusha Jayaraman says
The dish came perfectly well when i tried the first time! And the second time flunked :/ I didnt have enough curd and added more water instead..dont know if that was the problem or should I have been mixing in heat for much longer time.